Suggested Workflows
Sharing Work on a Ticket
Some tickets require attention from more than one agent (or even more than one department!). In these cases, there are three ways to assign the work to the right people:
If a ticket is really about two different problems, you can split it in two, then assign each ticket to its respective “group” (department).
If you’ve done all you can on a ticket and it’s now another agent’s (or department’s) responsibility, reassign it to a new owner (or group).
If you just need another agent’s input on something, you can @mention them. (And if you want to get notifications for someone else’s ticket, use the subscribe button.)
Reassigning Tickets
Reassign a ticket (via the Group and Owner settings) to let colleagues know you’re done with your part.
Suppose a call comes into the sales department. A sales rep takes the call, creates a ticket, and looks up some prices for the customer. After recording his notes, the rep then decides that this ticket needs to be passed onto customer service.
Our sales rep can simply un-assign himself as the owner of the ticket and re-assign the ticket to the Customer Service group. All customer service agents will be notified of the incoming ticket, and the first available agent can assign herself to pick up where the sales rep left off.
Tip
Be sure to leave notes with as much information as possible for the next agent!
@mentions & the Subscribe Button
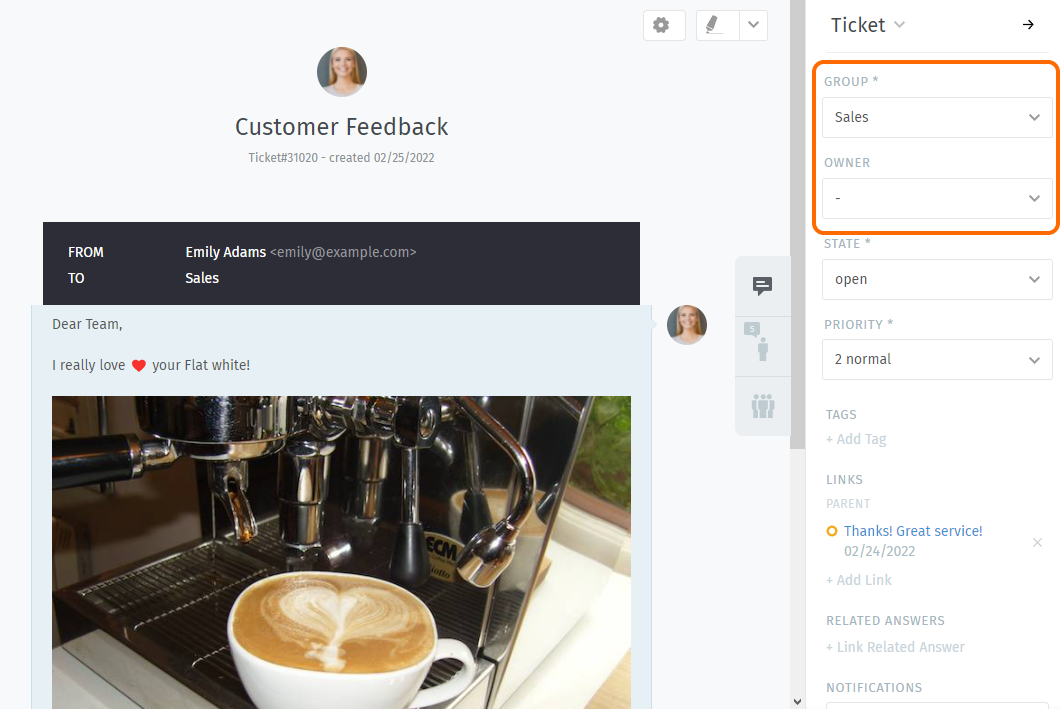
Now suppose you’ve reassigned the ticket to customer service. You won’t receive notifications for this ticket anymore, but maybe this is a really important contract, and you want to make sure they have an A+ experience from start to finish.
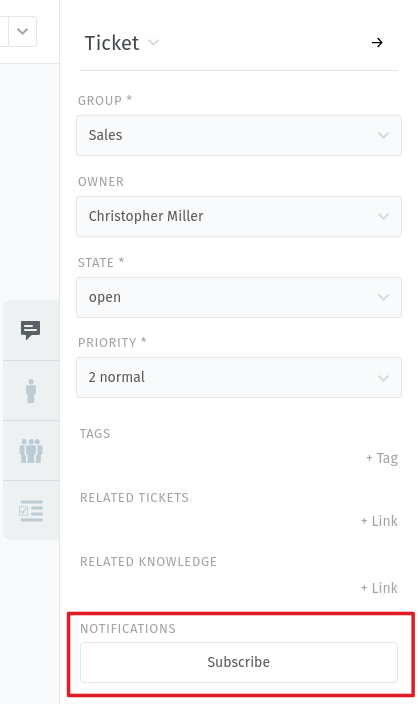
To enable notifications for a ticket that doesn’t belong to you,
simply click the Subscribe button at the bottom of the ticket sidebar:
Or, suppose you don’t want to reassign the ticket to customer service, you just have one quick question for them, and then you can take it from there. To start sending someone else notifications for your own ticket, type @@ in the message editor and select their name from the pop-up menu. This will automatically subscribe them to your ticket.
Hint
⚙️ Notification settings
Check your User Menu & Profile Settings to customize how you receive notifications.
Can’t see a ticket, in which a colleague @mentioned you?
Is the ticket assigned to a group that you don’t belong to? @mentions and subscriptions only work for tickets that you already have access to.
Quickly Assign in Ticket Listings
Within overviews and detailed searches you can run bulk operations on tickets. This means you can adjust the following ticket information:
Group
Owner
State (with pending time, if applicable)
Priority
After pressing Confirmation, Zammad also allows you to provide an internal
or public note in the Comment field which gets added to each of the selected
tickets.
Zammad doesn’t ask for time accounting values in bulk actions.
- Bulk action via drop-downs
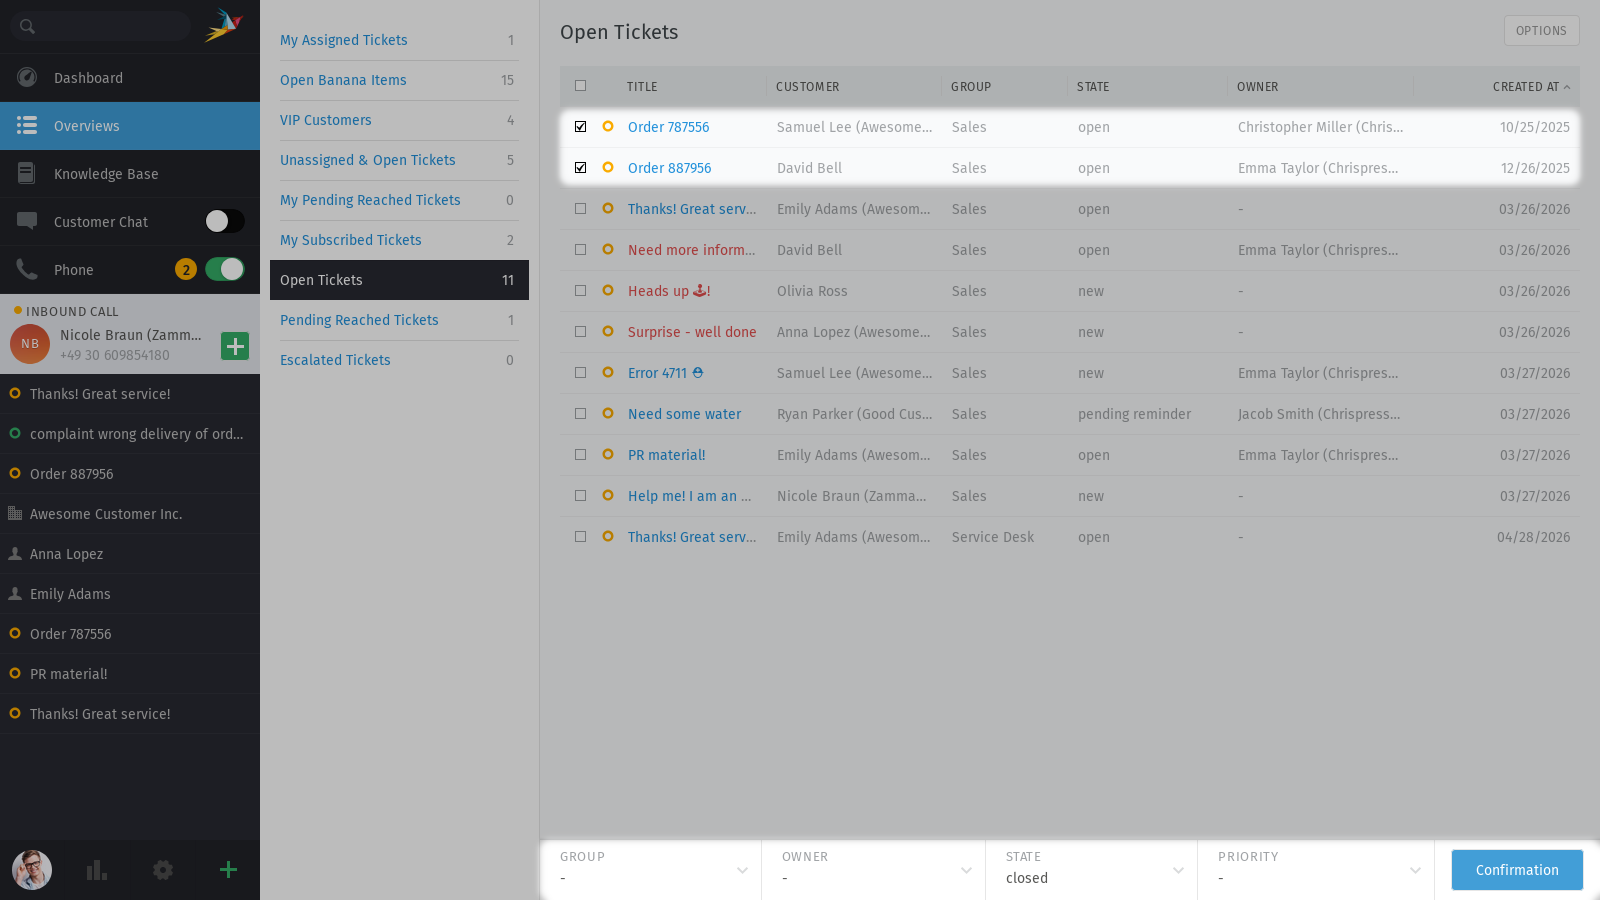
Use the check boxes in ticket listings to select a bunch of tickets. Now use below drop-downs to change ticket settings, press confirm and provide a note if you’d like.
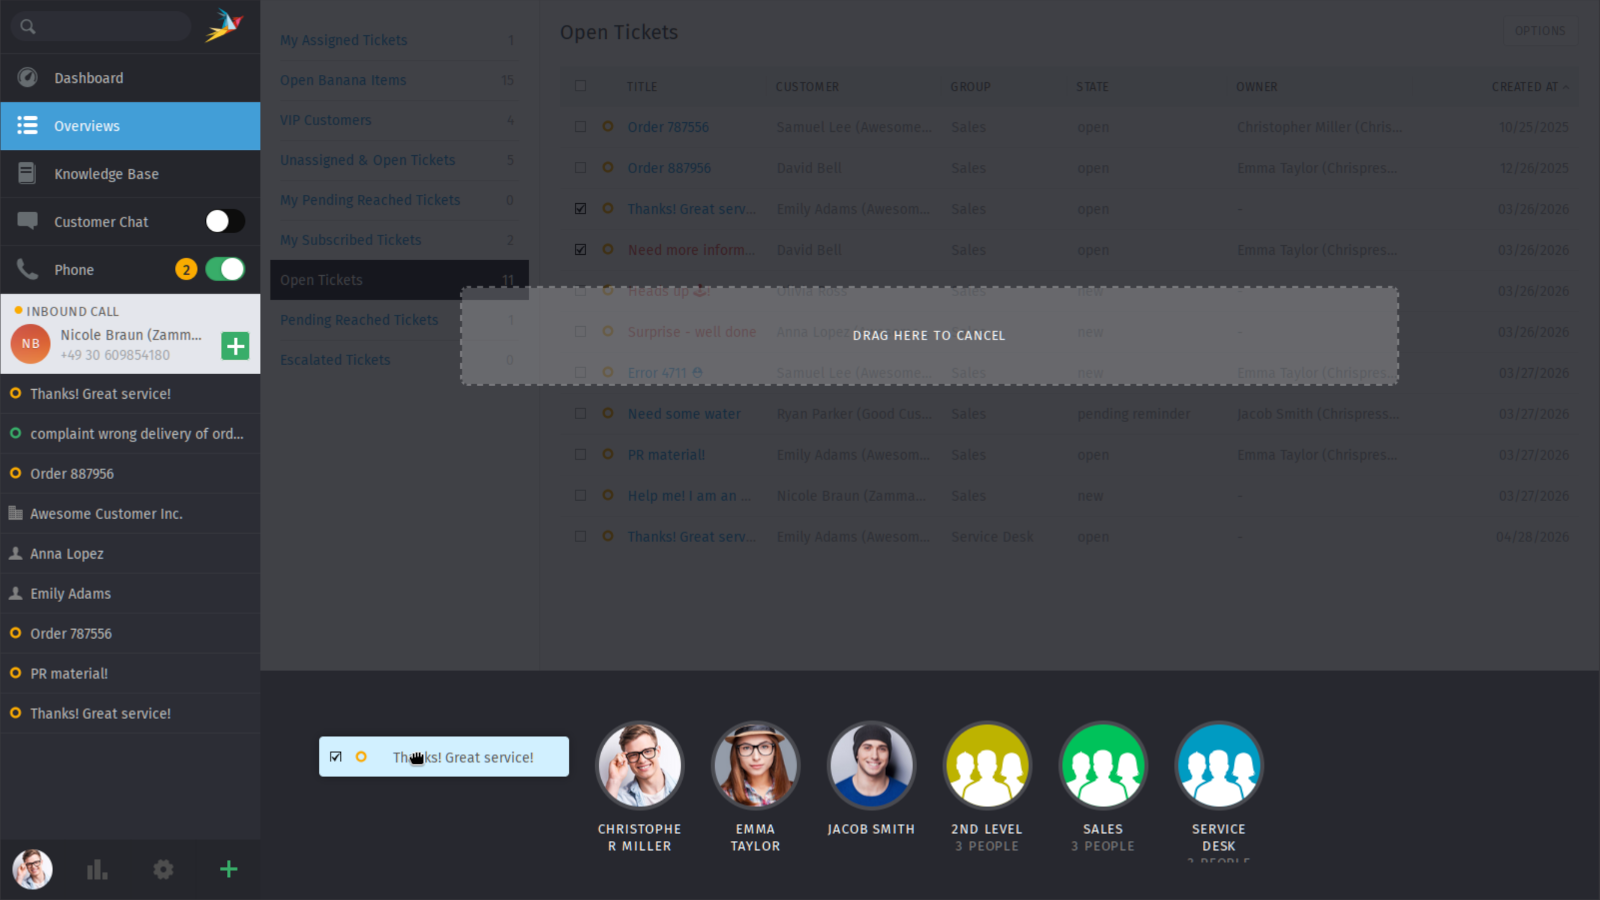
- Bulk action via drag and drop
You can change owners and groups even faster. Instead of using the drop-downs on the bottom of Zammad, you can drag tickets by pressing and holding your mouse button. Doing so triggers an overlay and allows you to drop your selection on your desired action or entity. You can select a group, assign an owner or run a macro. This functionality is only available in overviews and the detailed search page.
Initial overlay when you start dragging:
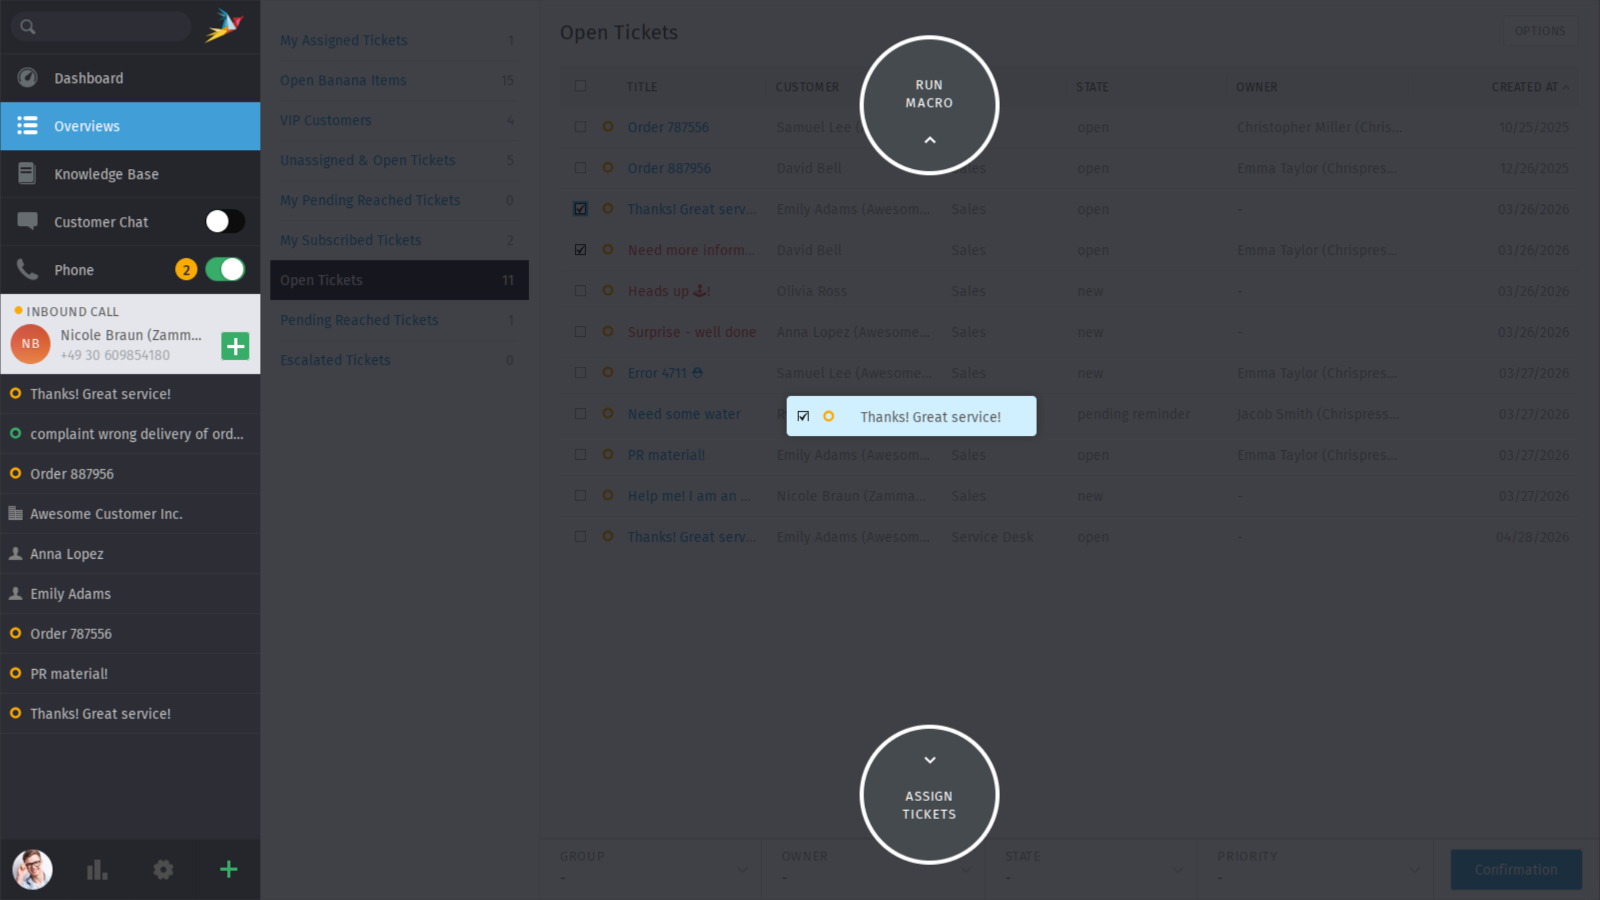
Move the mouse to the
Assign Ticketsaction at the bottom and you will see groups and agents for ticket assignment: