Macros
If you find yourself repeating the same steps frequently, you should use a macro.
In such a macro, your admin can pre-define different ticket actions you
can apply with just a click. As an example, Zammad ships a
Close & Tag as Spam macro by default. If applied, the user who executes the
macro is assigned as owner, a tag spam is added and the ticket is closed.
It is even possible to run an AI agent within a macro on
demand. Read on to learn how to run macros in two different ways.
On a Single Ticket
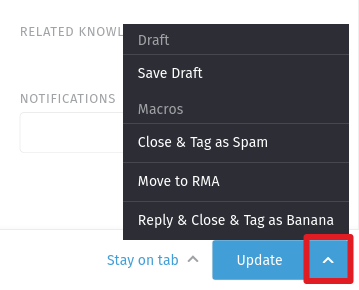
The simplest way to apply a macro is to select it from the Update submenu
in the ticket detail view:
Warning
Running a macro updates the ticket immediately. If you made any changes, e.g. typing a reply draft to the customer, applying a macro will save/send them too. In the case of a conflict, the macro’s actions override any manual changes. Try to apply your changes and the one from the macro separately.
In Bulk
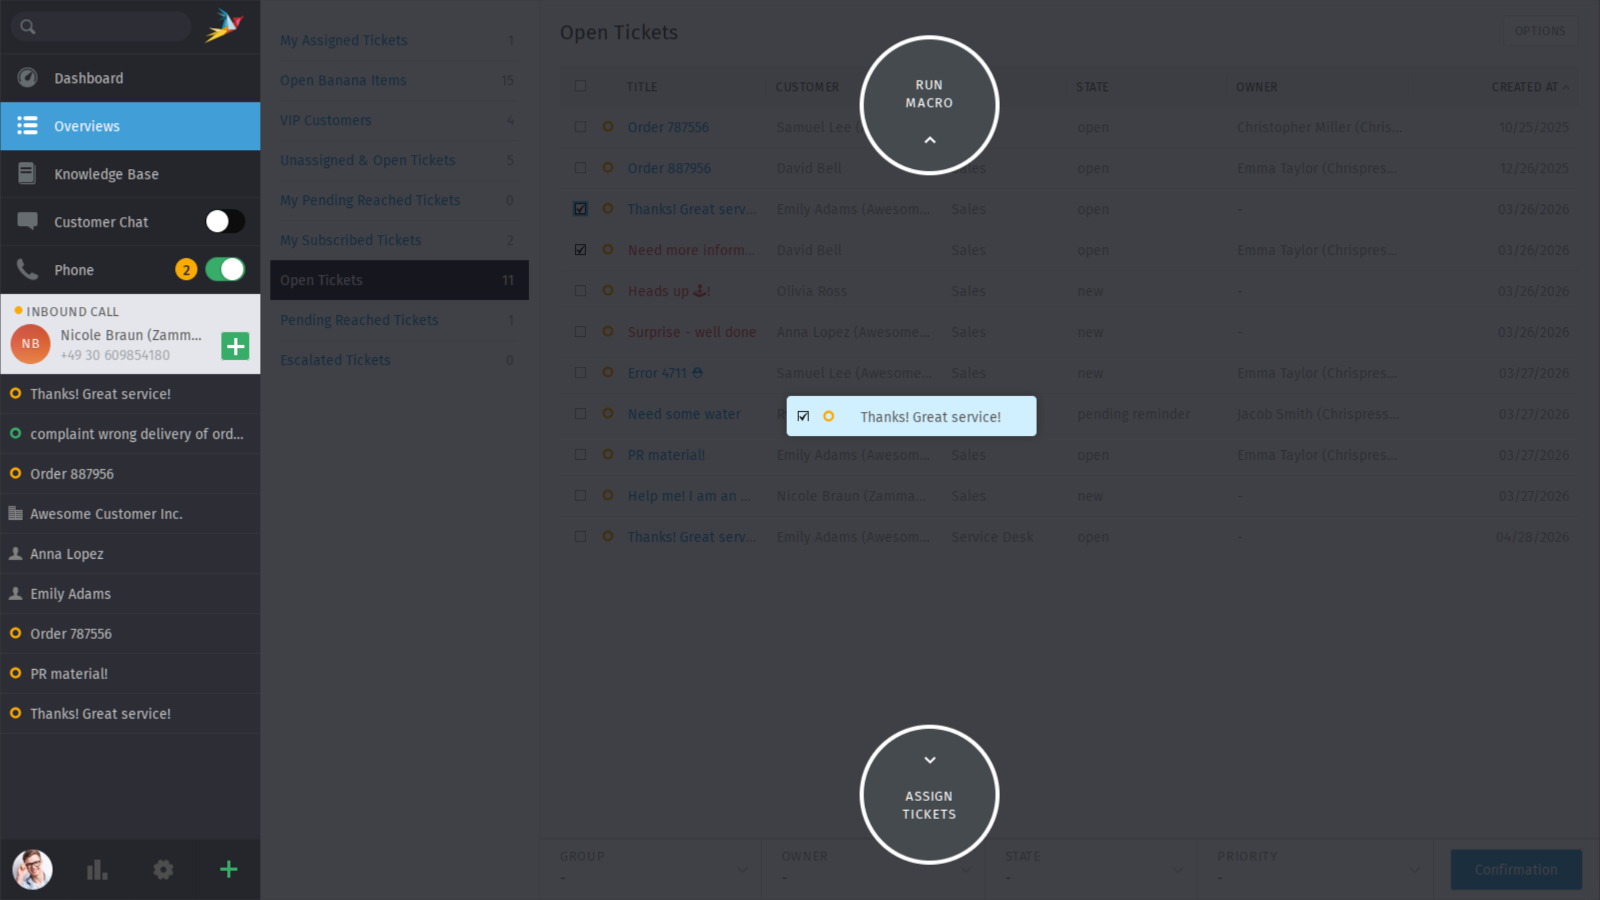
To apply a macro to many tickets at the same time:
Open a ticket overview or the detailed search
Select your desired tickets
Drag the tickets to the top and hover over the
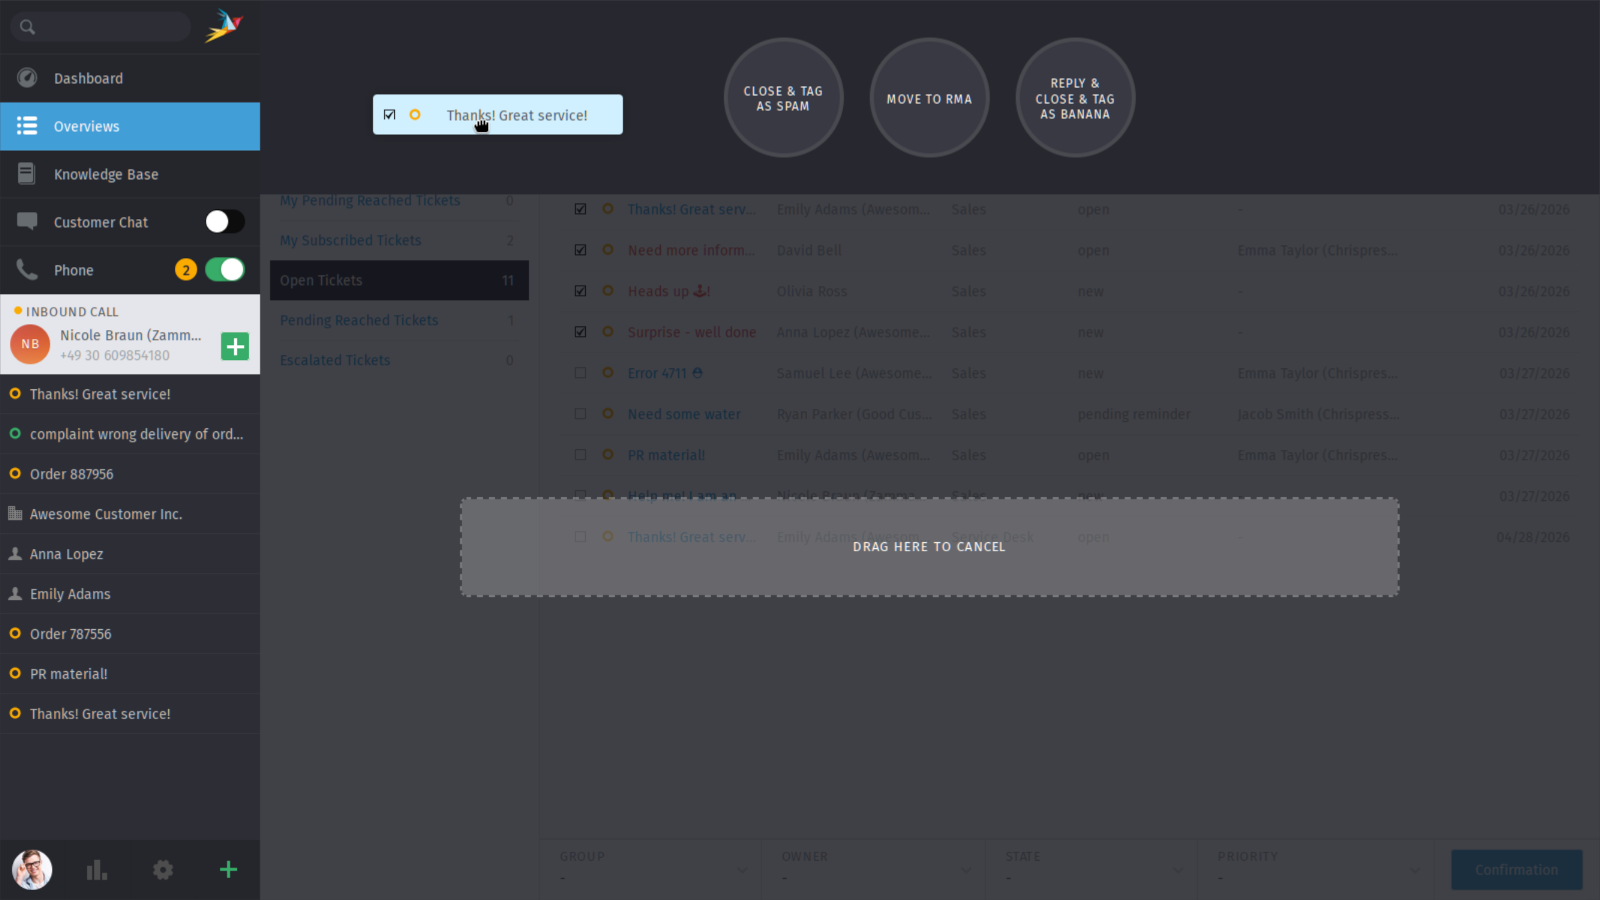
Run MacroactionDrop the tickets on your target macro.
Initial overlay when you start dragging:
Move the mouse to the Run Macro action at the top and you will see the
available macros:
Note
☝️ There’s just one difference… When running a macro from the ticket detail view, Zammad may automatically open the next ticket (or close the current one, or just stay on it), depending on how the macro was set up. When running it from the overviews page, Zammad will always stay on the overviews page.