Ticket Basics
Introduction
In Zammad, tickets are used to track customer service requests. The first time a customer contacts you about something, Zammad creates a new ticket. Each message sent between you and the customer is added to that ticket until the issue is resolved, the customer is happy and the ticket is finally closed. Such a single message in a ticket is called article. Basically, you can think of a ticket as a conversation between you and a customer about a single issue.
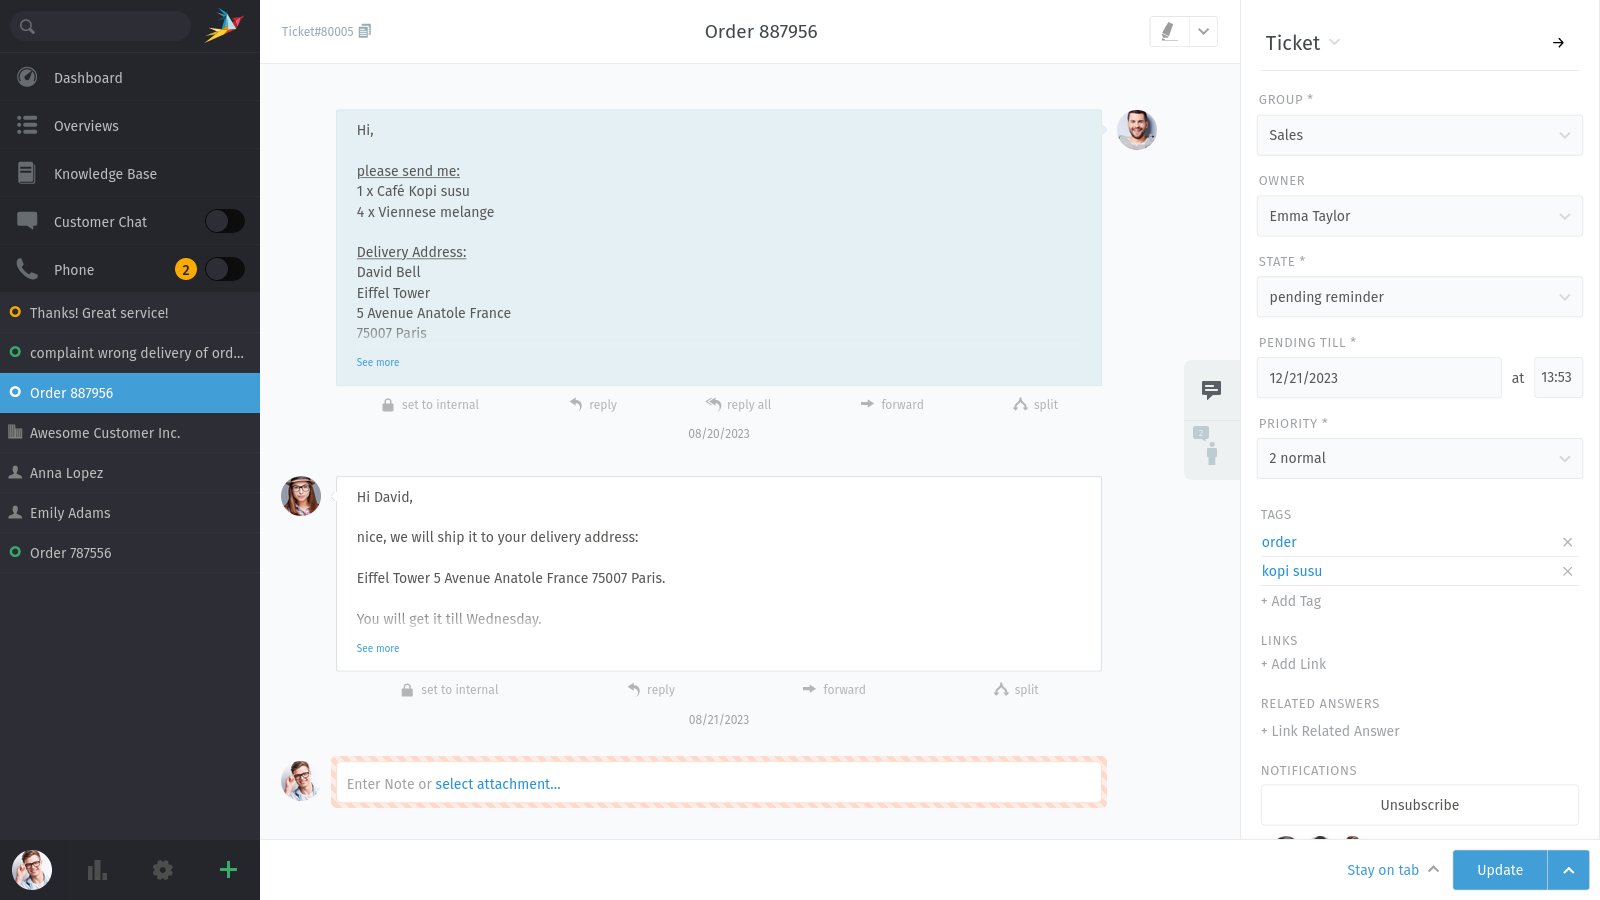
If you’re completely new to a ticket system and handled your customer requests with an email client so far, you might think that a ticket system is complicated. But the opposite is true:
All emails are now collected in Zammad (and requests from other channels might be as well).
You and your colleagues can see who is working on which customer request (“ticket”).
The state of each request as well as the history (who did what?) is transparent.
There is no duplicate work and nothing gets overlooked.
You can ask your colleagues directly in the ticket for help in difficult cases.
With Zammad’s intuitive UI, you can focus on what matters: to resolve customer issues and answer customer questions.
This means you can work with Zammad in a similar way as with your email client. Except that a ticket has additional attributes. Read on to learn more.
Ticket Attributes
In addition to articles, tickets have some additional meta information which are called attributes. Use the ticket sidebar to view and change ticket attributes.
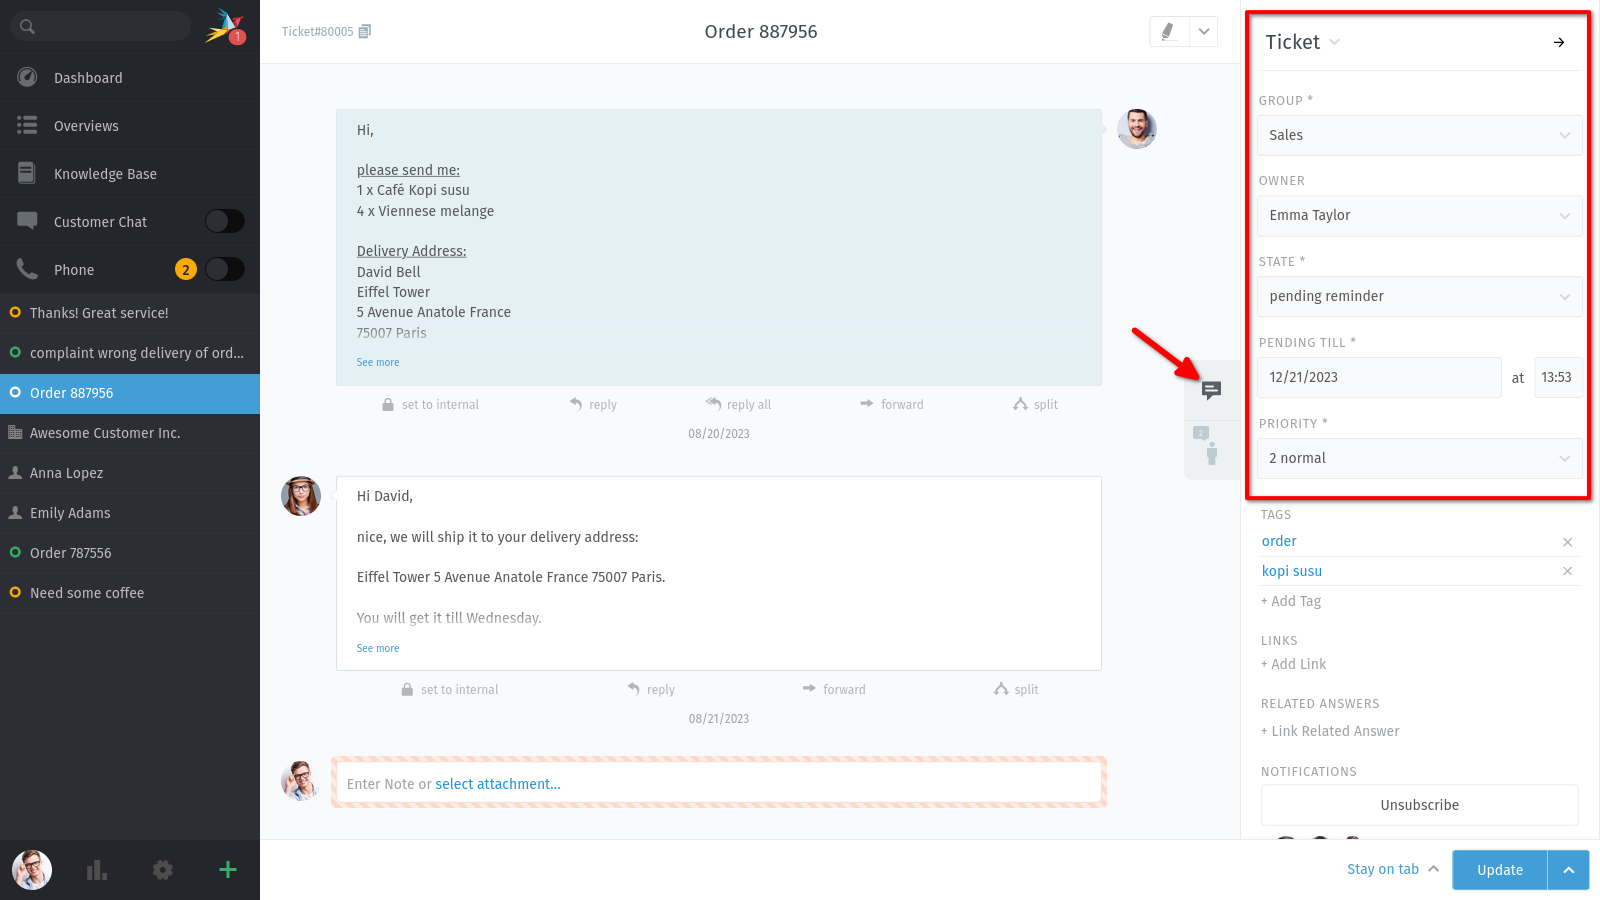
To hide the sidebar, click the arrow button → in the top right corner. Click on one of the tabs to bring it back. The available options depend on your privileges and the configuration of your system.
It is even possible to create custom fields for tickets (for groups and users too). You think such a custom field makes sense? Talk with your Zammad admin, it can be set up easily (admins can read more here).
State
The state reflects the current status of a ticket (mainly if a customer request is resolved or not). Think of it as a representation of progress towards completion. By default, there are the following states:
New: State for new tickets on which no one has worked on. When updating a ticket the first time, it automatically switches to open.
Open: State for tickets which aren’t resolved yet and some work needs to be done.
Pending Close: State for tickets which are basically resolved but you don’t want to close immediately. This state requires you to enter a date and time at which the ticket automatically switches to closed.
Pending Reminder: State for open tickets which you want to get reminded to a certain date and time. Requires you to enter a date and time at which you want to get notified. For example useful if you had a question to a third party and want to make sure that this issue won’t be forgotten.
Merged: State for a ticket which was merged into another ticket. Check the linked tickets or the ticket history to see the related ticket.
Zammad’s states are color coded. This helps you to understanding the state of the ticket much faster in general - without having a look into details.
Action needed (e.g. new, open, pending reached) |
|
Paused, no action needed right now (e.g. pending) |
|
No action needed any more (e.g. closed, merged) |
|
Immediate action needed (ticket escalated due to an SLA violation) |
Priority
A ticket’s priority is simply a ranking (from 1 to 3) of how urgent or important it is. The three default priorities are:
1 low
2 normal
3 high
In case these priorities aren’t enough, ask your Zammad admin to create additional ones. Admins can find more information here. The default priorities allow you to immediately recognize the importance of your tickets because they are color coded:
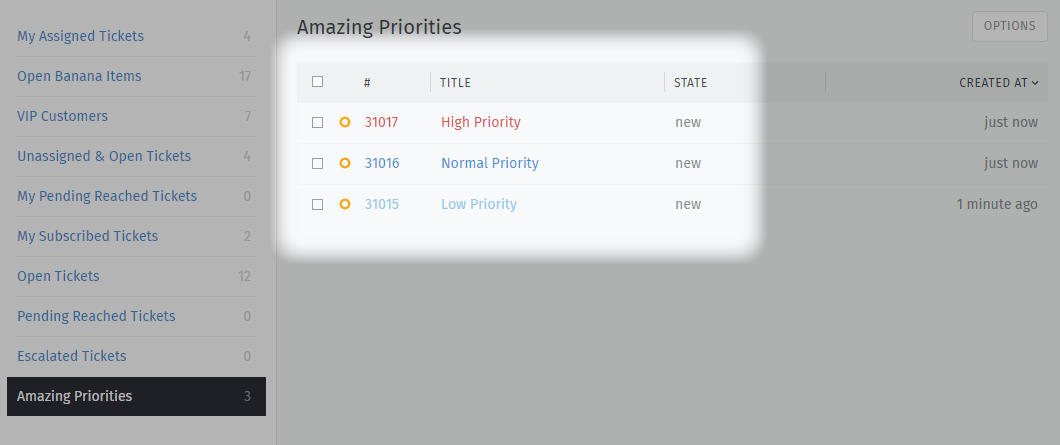
You might wonder what such a ticket priority is for. Out of the box, it doesn’t actually do anything except the highlighting. However, Zammad administrators can set up all sorts of automation and analytics based on the priority.
Be aware that customers can’t set a priority for their own tickets. Otherwise some might set their tickets always to high and hope for an immediate escalation.
Tags
Tags are custom labels that can be attached to tickets to make it easier to find them in the future. You find the tag section under the attribute fields.
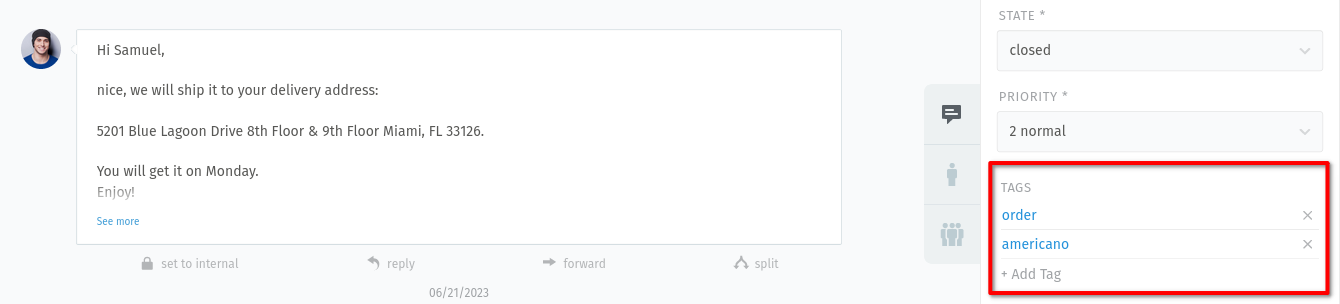
To add a tag, click the + Tag button. Depending on your Zammad’s
configuration, you can create new tags by simply type and confirm them with
enter or tab. In any case, you can choose from already available
tags. Start typing and you see a list with matching suggestions. To remove it,
click the X button on the right side of the tab.
Group
This ticket attribute is useful for organizations with more than one team. A common way to use groups is to have one for each department of the company. Depending on the permissions, you might not see the ticket after changing the group and saving the changes. In case you can’t see the group field, either there is only one group in your Zammad system or you don’t have the permission to create a ticket in other groups.
Owner
This is the person who is currently responsible for the ticket. In case you need information from another colleague, you can either change the owner to this person or mention the person in an article by typing @ @ and selecting the user. In the latter case, the user gets notified and is automatically subscribed to receive notifications on ticket updates.
To change the owner to a person which has only access to another group’s tickets, you first have to switch the group accordingly.
Now that you know the basics, check how to create or work with tickets.