Profile & Settings
Click on your avatar at the bottom of the main menu to access your profile and settings.
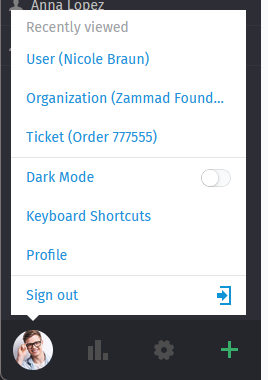
Find user-specific actions, a list of recently opened items, and useful reference information.
Clicking on your avatar picture provides the following three sections.
- Recently viewed
All information you’ve viewed previously (tickets, users, organizations). Helps you to jump back quick and easy without searching or looking in your overviews.
Note
This list is limited, old entries will automatically vanish.
- Further actions
- Dark mode
Quickly toggle dark and light mode without using keyboard bindings.
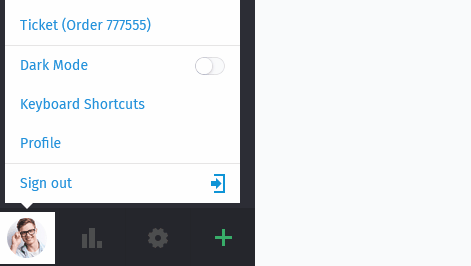
- Keyboard shortcuts
- Profile
This will open your Profile Settings and provide further options for customers and agents.
Note
Customers do not have access to all areas, even if you provide them the permissions to those areas.
- Sign out
Finished working with Zammad? Use the sign out button to end your user session.
Hint
If you didn’t tick “Remember me” during login or used a third party login, your session will automatically be invalidated if you close and reopen your browser.
Profile Settings
- Appearance
- Theme
Select how Zammad should look. Zammad will remember the setting you choose here.
Dark
Light
Sync with computer
For dark and light you’ll fix the dark or light mode to your taste.
If you choose sync with computer, Zammad will dynamically select the mode depending on what your client prefers at that moment.
Note
Synchronizing the theme preference highly depends on your browser. If your browser does not support syncing, this setting basically has no effect.
Most common modern Browsers do so (e.g. Firefox, Google Chrome)
- Language
Set the system display language.
- Avatar
Upload an avatar.
- Password
Change your login password (may be disabled by system admin).
- Notifications
Select where, when, and for which groups you want to receive notifications, or choose a new notification sound.
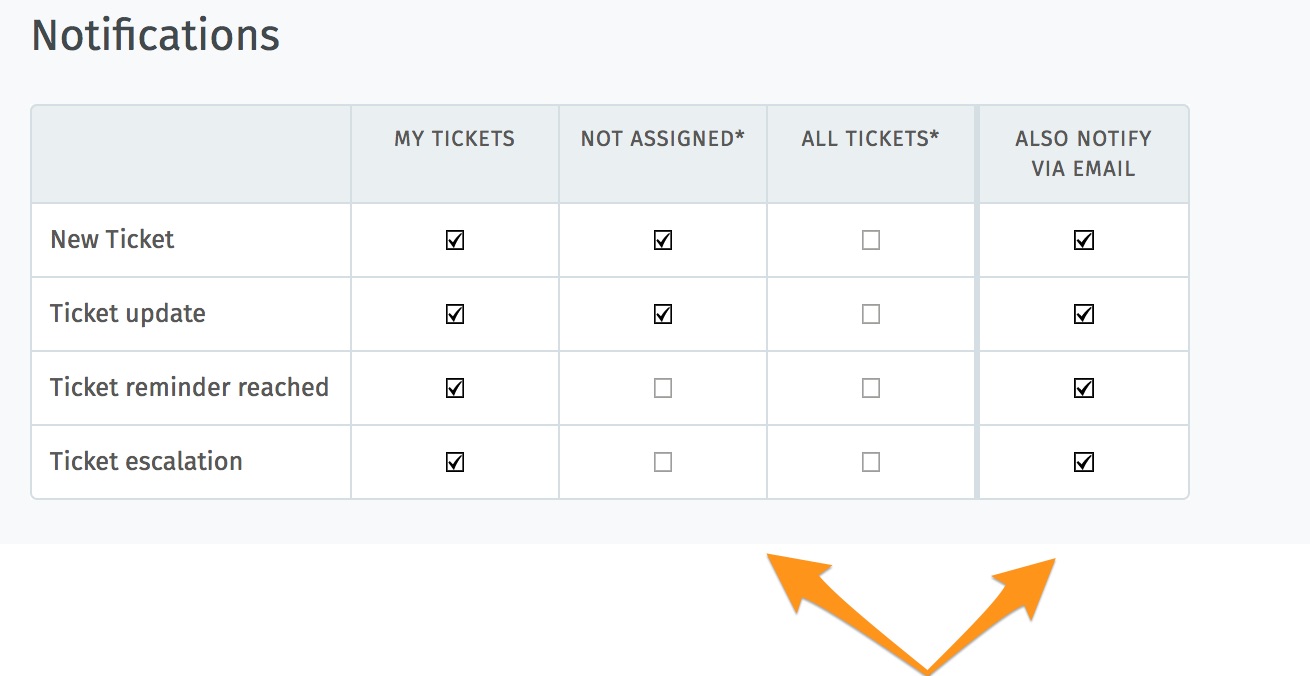
Use the first three columns to choose when to receive internal notifications (below). The rightmost column enables email notification as well.
Internal notifications cannot be disabled.
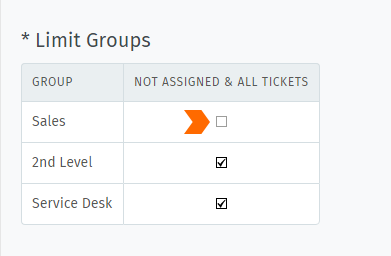
By default, you will receive notifications for all tickets on every group you belong to—even for tickets that are assigned to other agents. Use the Limit Groups box to disable such notifications on a per-group basis. (You will continue to receive notifications for your own tickets.)
Note
Notifications are available to agents only.
Hint
The contents of these email notifications can be customized on self-hosted installations. Administrators can learn more here.
- Out of Office
Schedule absence periods in advance, and designate a substitute to handle your tickets while you’re gone.
Your substitute will receive all your ticket notifications during your absence, and have a custom overview created to help keep track of your tickets.
Note
🔔 You will continue to receive notifications while you are absent.
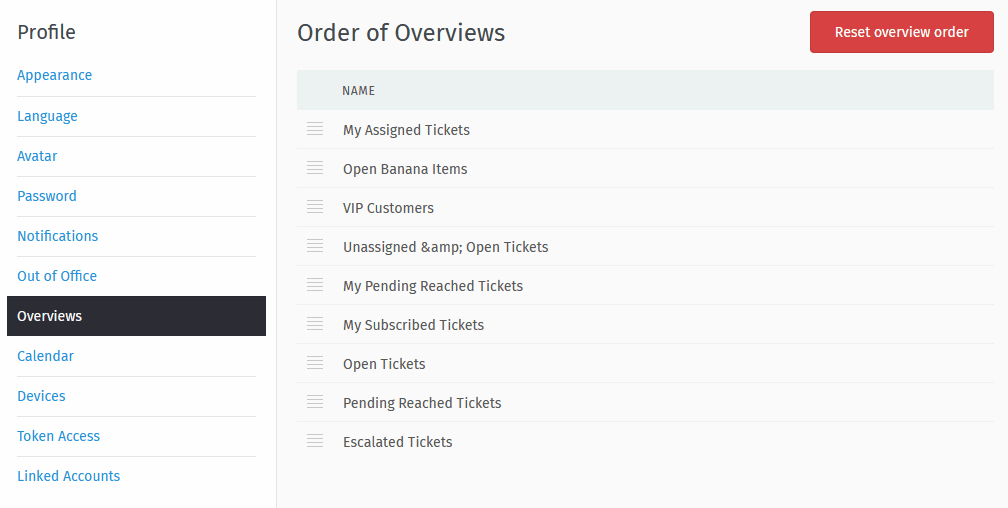
- Overviews
Tired of the overview order your admin decided on? This section allows you to choose an overview order that fits you the best.
You can revert to the default instance ordering at any time by using the upper right button “Reset overview order”.
Hint
🤓 Your admin has no power here
The order does not change, even if your admin renames or reorders the overviews. The overview order is stored in your profile and thus applies for any device you use with your account.
Note
😕 Can’t see this setting?
This setting option is only available to agents by default. Admins can also deactivate this permission entirely. Ask your admin to enable this option if you need it.
- Calendar
Add your ticket deadlines to your own favorite calendar app with the ICAL link listed at this setting’s panel.
- Devices
See a list of all devices logged into your Zammad account (and revoke access, if necessary).
- Token Access
Generate personal access tokens for third party applications to use the Zammad API.
Caution
Always generate a new token for each application you connect to Zammad! (This makes it possible to revoke access one application at a time if a token is ever compromised.)
- Linked Accounts
See a list of third party services (e.g., Facebook or Twitter) linked to your Zammad account.